Tuesday, September 9, 2025
Tuesday, February 4, 2025
Angular Basic concepts
App-root-> defined in index.html
app.module.ts-> at least 1 component. Grouping multiple components.
Component is combination of HTML+CSS+.TS+spec.ts
In ts file-> linking happens
@componnet -> decorative, without decorative it is plain JS file
convers ts file into component-> using decorator
index.html-> Single page application
A selector in Angular is like an address for a component. It tells Angular where to display that component in the HTML structure. When Angular finds the selector in the HTML, it replaces it with the component's template. Selectors can be element names, attributes, classes, or combinations of these. For example, a selector app-example would be used in HTML as <app-example>, while [app-example] would be used as <div app-example>. This mechanism allows for modular and reusable components in Angular
the data in JS or ts file need to shown in HTML is nothing but databinding . because Browser understand HTML+JS+CSS.
One way databinding->communication(passing data) bewteen .ts file and html file or vice -versa


Feature | TypeScript | JavaScript |
|---|---|---|
Typing | Statically typed (optional) | Dynamically typed |
Compilation | Requires compilation to JavaScript | No compilation needed |
Object-Oriented | Supports classes, interfaces, and other OOP features | Prototype-based, but supports OOP concepts |
Tooling Support | Excellent IDE support, advanced tooling | Limited built-in tooling |
Scalability | Well-suited for large projects | Best for small projects and quick prototyping |
Error Detection | Early error detection during development | Errors detected at runtime |
Code Readability | Enhanced readability due to type annotations | Can be less readable in large projects |
Generics | Supports generics | Does not support generics |
Decorators | Supports decorators | Does not support decorators |
Use Cases | Large-scale applications, complex projects | Web development, scripting, small projects |
----------------------------------------------------------------------------------------------------------------
Q) Difference between angular and react js:
A) Angular and React are both popular JavaScript technologies for building user interfaces, but they have fundamental differences:
1. Type:
Angular is a JavaScript framework built using TypeScript while React is a JavaScript library built using JSX.
2. Framework vs Library:
Angular:
A complete framework, providing a structured environment for building complex applications. It offers built-in features for routing, state management, form handling, and more.
React:
A JavaScript library focused on building UI components. It's more lightweight and flexible, requiring additional libraries for advanced features like routing and state management.
3. Data Binding:
Angular:
Employs two-way data binding, meaning changes in the UI automatically update the underlying data model, and vice versa.
React:
Utilizes one-way data binding, where data flows in a single direction, making it easier to understand and debug complex applications.
4. Language:
Angular: Primarily uses TypeScript, a superset of JavaScript that offers static typing and improved tooling support.
React: Primarily uses JavaScript, although TypeScript can also be used.
5. Performance:
Angular:
Can be less performant for large applications due to its complex change detection mechanism and full-fledged nature.
React:
Generally performs better than Angular, thanks to its virtual DOM and optimized rendering algorithms.
6. Learning Curve:
Angular:
Has a steeper learning curve due to its complex architecture and extensive features.
React:
Has a relatively easier learning curve, focusing on component-based development and using plain JavaScript.
7. Community and Ecosystem:
Angular: Has a large and active community, backed by Google.
React: Also has a large and vibrant community, backed by Facebook.
Choosing the Right Option:
Angular:
Suitable for building enterprise-level applications with complex requirements and where a structured framework is preferred.
React:
Suitable for building highly interactive user interfaces, single-page applications, and projects where flexibility and performance are prioritized.
-----------------------------------------------------------------------------------------------------------------------------
- This is a standard JavaScript class constructor and is the first method to be executed when a new component instance is created. It's primarily used for dependency injection and setting up initial component state.
- Called before
ngOnInit()and whenever one or more data-bound input properties of the component change. It receives aSimpleChangesobject containing the current and previous values of the changed properties. - Invoked once after the first
ngOnChanges(). It's commonly used for initialization logic, such as fetching data from a service or setting up subscriptions. - Called during every change detection cycle, after
ngOnChanges()andngOnInit(). It allows for custom change detection logic, but should be used sparingly due to its performance impact. - Invoked once after Angular projects external content into the component's view.
- Called after
ngAfterContentInit()and after every subsequentngDoCheck(). - Invoked once after the component's view and child views have been fully initialized.
- Called after
ngAfterViewInit()and after every subsequentngDoCheck(). - Called just before the component or directive is destroyed. It's used for cleanup tasks, such as unsubscribing from observables and detaching event listeners, to prevent memory leaks.
- Dependency Consumer: A class that requires a dependency.
- Dependency Provider: An object that creates and provides the dependency.
- Injector: A container that manages dependency providers and injects dependencies into consumers.
- A component or service declares its dependencies in its constructor using type annotations.
- Angular's injector checks if the requested dependency already exists. If not, it creates a new instance using the configured provider.
- The injector then injects the dependency into the requesting class.
Thursday, March 17, 2022
Azure for beginners
Q) What is Azure?
Azure is a public cloud computing platform—with solutions including Infrastructure as a Service (IaaS), Platform as a Service (PaaS), and Software as a Service (SaaS) that can be used for services such as analytics, virtual computing, storage, networking, and much more. It can be used to replace or supplement your on-premises servers.
Microsoft Azure – IaaS, PaaS and SaaS
Flexible – Move compute resources up and down as needed
Open – Supports almost any OS, language, tool, or framework
Reliable – 99.95% availability SLA and 24×7 tech support
Global – Data housed in geo-synchronous data centers
Economical – Only pay for what you use
Azure is a fast, flexible, and affordable platform, and its pricing and capabilities make it the best public cloud offering on the market.
1. Enhance and Implement Backup and Disaster Recovery
Azure is a backup and disaster recovery dream tool. Why? Because of its flexibility, advanced site recovery, and built-in integration. As a cloud-based solution, Azure is innately flexible – it can back up your data in almost any language, on any OS, and from any location. Plus, you define the frequency and extent of your backup schedule (daily, weekly, monthly, etc.).
Tape backup has a time and place, but it has limited abilities as a stand-alone backup and disaster recovery solution. Azure site recovery can enhance your tape backup with offsite replication, minimal onsite maintenance, up to ninety-nine years of data retention, minimal or no capital investment, and minimal operational costs. Azure backup stores three copies of your data in three different locations in the data center, and then another three copies in a remote Azure data center, so you never have to worry about losing data.
If you’re in a Windows virtual environment, Azure’s built-in integration for additional backup will be a quick and painless solution. Azure site recovery integrates with System Center and Hyper-V architectures, creating a robust and seamless cohesion between Azure, System Center, and Hyper-V.
2. Host and Develop Web and Mobile Apps
Whether you’re looking for a platform for hosting, developing, or managing a web or mobile app, Azure makes those apps autonomous and adaptive with patch management, Auto Scale, and integration for on-premises apps.
With Automatic patch management for your virtual machines, you can spend less time managing your infrastructure and focus on improving your apps. Azure also comes with continuous deployment support, which allows you to streamline ongoing code updates.
Auto Scale is a feature built into Azure Web Apps that adjusts your resources automatically based on customer web traffic, so you have the resources you need when traffic is high and save money when you’re not in peak times.
Through Azure, you can seamlessly link your web app to an on-premises app. Connecting apps in both locations lets both employees and partners securely access resources inside your firewall—resources that would otherwise be difficult to access externally.
3. Distribute and Supplement Active Directory
Azure can integrate with your Active Directory to supplement your identity and access capabilities—this gives your DNS a global reach, centralized management, and robust security.
With Azure, you can globally distribute an Active Directory environment that is direct connect enabled. No other cloud provider has the ability to extend the reach of your domain controller and consolidate AD management like Azure.
If you have multiple locations or use on-premises apps or cloud apps like Microsoft 365, Active Directory integration with Azure will be the central tool for managing and maintaining access to all of these tools.
Azure also enables you to utilize multi-factor authentication, adding a new layer of security to your data and applications with zero hassle for your users. You can also easily implement single sign-on for Windows, Mac, Android, and iOS cloud apps.
4. Innovate with IoT Industry Solutions
The scalability, flexibility, and security of Microsoft Azure makes it the perfect resource for companies moving toward IoT solutions. You can connect your devices to the cloud using solutions that integrate with your existing infrastructure and start collecting new data about your company.
Within the Azure IoT Hub, you can monitor and manage billions of devices and gain insights to help you make better business decisions, improve customer experiences, reduce complexity, lower costs, and speed up development.
The enhanced security of Azure is a huge asset for IoT solutions, which traditionally have security gaps that hackers can take advantage of. Other benefits include remote monitoring and predictive maintenance and analytics.
Getting started is easy with Azure IoT solution accelerators, preconfigured templates that are customizable to your needs.
Sunday, January 30, 2022
DOT NET CORE Basic Interview Question and Answers
Q) What is the startup class in ASP.NET core?
A) Startup class is the entry point of the ASP.NET Core application. This class contains the application configuration related items. It is not necessary that class name must "Startup", it can be anything, we can configure startup class in Program class.
Startup Class:- Constructor:
- Typically accepts an
IConfigurationinstance, allowing access to application settings from sources likeappsettings.json.
- Typically accepts an
ConfigureServicesMethod:- This method is called by the runtime to add services to the dependency injection (DI) container.
- It accepts an
IServiceCollectionparameter, where you register services (e.g., database contexts, authentication services, MVC/Razor Pages services) that your application will use.
ConfigureMethod:- This method is called by the runtime to configure the application's HTTP request pipeline using middleware.
- It accepts
IApplicationBuilderandIWebHostEnvironment(orIHostEnvironment) parameters. - You define the order of middleware components (e.g., routing, authentication, authorization, static files, error handling) in this method.
- This method is called by the runtime to configure the application's HTTP request pipeline using middleware.
Program.cs:Program.cs structure, the Startup class is specified during host building:-----------------------------------------------------------------------------------------------------------------------------
Q) What is the use of Configure Services method of startup class?
A) This is an optional method of startup class. It can be used to configure the services that are used by the application. This method calls first when the application is requested for the first time. Using this method, we can add the services to the DI container, so services are available as a dependency in controller constructor.
(or)
A) It defines how the application will respond to each HTTP request. We can configure the request pipeline by configuring the middleware. It accepts IApplicationBuilder as a parameter and also it has two optional parameters: IHostingEnvironment and ILoggerFactory. Using this method, we can configure built-in middleware such as routing, authentication, session, etc. as well as third-party middleware.
-----------------------------------------------------------------------------------------------------------------------------
Q) What is middleware?
Middleware in ASP.NET Core refers to software components that are assembled into an application pipeline to handle requests and responses. Each middleware component can choose whether to pass the request to the next component in the pipeline and can perform work before and after the next component.
Key characteristics and functions of ASP.NET Core Middleware:
Request/Response Handling: Middleware components are designed to process incoming HTTP requests and outgoing HTTP responses. They form a chain, where each component can inspect, modify, or even short-circuit the request/response flow.
- Middleware components are executed in a specific order, forming a pipeline. The order in which they are added to the pipeline is crucial, as it determines the sequence of operations.
- .NET Core provides many built-in middleware components for common tasks (e.g., authentication, routing, static file serving, exception handling). Developers can also create custom middleware to implement specific application logic.
- Middleware components are configured in the
Configuremethod of the application'sStartupclass (or directly withinProgram.csin newer .NET versions) using methods likeUse,Run, andMapon theIApplicationBuilderinterface.
app.Use()
app.useis used to register middleware components in the application's request pipeline.
- Middleware registered with
app.usecan perform actions on the incoming request and/or outgoing response, and then optionally pass the request to the next middleware in the pipeline using anextdelegate or function. - This allows for a chain of responsibility where multiple middleware components can process a request sequentially.
- Examples include logging middleware, authentication middleware, error handling middleware, or static file serving middleware.
Example:
Code
app.Use(async (context, next) =>
{
// Do something before the next middleware
await next.Invoke(); // Call the next middleware
// Do something after the next middleware
});
app.Run()
Purpose: app.Run() adds a middleware component that terminates the request pipeline. It generates a response and prevents any subsequent middleware components from executing.
- Once
app.runis executed, no subsequent middleware in the pipeline will be invoked for that request. - It is typically used to define the final action for a specific route or to provide a default response if no other middleware has handled the request.
Example:
Code
app.Run(async context =>
{
await context.Response.WriteAsync("Hello from app.Run!"); // Terminate the pipeline with this response
});
In summary:

app.Map: This method creates a branch in the middleware pipeline based on a matching request path. It allows you to define a separate, isolated middleware pipeline that only executes for requests whose paths match a specified prefix.(OR)
UseDeveloperExceptionPage: Catches exceptions and displays detailed error information during development.UseHttpsRedirection: Redirects HTTP requests to HTTPS.UseStaticFiles: Serves static files like CSS, JavaScript, and images.UseRouting: Matches incoming requests to defined routes.UseAuthenticationandUseAuthorization: Handle user authentication and authorization.
-----------------------------------------------------------------------------------------------------------------------------
Q) What is routing in ASP.NET Core?
A) Routing is functionality that map incoming request to the route handler. The route can have values (extract them from URL) that used to process the request. Using the route, routing can find route handler based on URL. All the routes are registered when the application is started. There are two types of routing supported by ASP.NET Core
The conventional routing
Attribute routing
The Routing uses routes for map incoming request with route handler and Generate URL that used in response. Mostly, the application having a single collection of routes and this collection are used for the process the request. The RouteAsync method is used to map incoming request (that match the URL) with available in route collection.
-----------------------------------------------------------------------------------------------------------------------------
Q) How to enable Session in ASP.NET Core?
A) The middleware for the session is provided by the package Microsoft.AspNetCore.Session. To use the session in ASP.NET Core application, we need to add this package to csproj file and add the Session middleware to ASP.NET Core request pipeline.
public class Startup
{
public void ConfigureServices(IServiceCollection services)
{
….
….
services.AddSession();
services.AddMvc();
}
public void Configure (IApplicationBuilder app, IHostingEnvironment env)
{
….
….
app.UseSession();
….
….
}
}
-----------------------------------------------------------------------------------------------------------------------------
Q) What are the various JSON files available in ASP.NET Core?
There are following JSON files in ASP.NET Core:
global. Json
launchsettings.json
appsettings.json
bundleconfig.json
bower. Json
package. Json
-----------------------------------------------------------------------------------------------------------------------------
How do you Register Services in ASP.NET Core?
Services are registered using the ConfigureServices method of the Startup class in ASP.NET Core. You use the provided IServiceCollection to add services to the application. There are several methods for registering services, including AddSingleton, AddScoped, and AddTransient, depending on the desired lifetime of the service instances.
Explain the differences between transient, scoped, and singleton services.
- Transient: A new instance is created every time the service is requested.
- Scoped: A new instance is created once per client request (e.g., per HTTP request in a web application).
- Singleton: A single instance is created the first time it's requested and reused throughout the application's lifetime.

-----------------------------------------------------------------------------------------------------------------------------
Q) What is XSRF or CSRF? How to prevent Cross-Site Request Forgery (XSRF/CSRF) attacks in ASP.NET Core?
A) Cross-Site Request Forgery (XSRF/CSRF) is an attack where attacker that acts as a trusted source send some data to a website and perform some action. An attacker is considered a trusted source because it uses the authenticated cookie information stored in browser.For example a user visits some site 'www.abc.com' then browser performs authentication successfully and stores the user information in cookie and perform some actions, In between user visits some other malicious site 'www.bad-user.com' and this site contains some code to make a request to vulnerable site (www.abc.com). It's called cross site part of CSRF.
-----------------------------------------------------------------------------------------------------------------------------
Q) How to prevent CSRF?
A) In ASP.NET Core 2.0 or later FormTaghelper automatically inject the antiforgery tokens into HTML form element.You can add manually antiforgery token in HTML forms by using @Html.AntiForgeryToken() and then you can validate it in controller by ValidateAntiForgeryToken() method.
-----------------------------------------------------------------------------------------------------------------------------
---------------------------------------------------------------------------------------------------------------------
FAQ:
Short notes:
DI Container (Service Container):
In .NET Core, this is a built-in system (implemented by IServiceProvider and configured via IServiceCollection) that manages the lifecycle of services and provides instances of dependencies when requested.
Injection:
The process of providing a required dependency from the DI container to a class. Common methods include:
Constructor Injection: Dependencies are passed as arguments to the class's constructor. This is the most common and recommended approach.
Property Injection: Dependencies are assigned to public properties of the class.
Method Injection: Dependencies are passed as arguments to a specific method of the class.
Register Services:
In your application's Startup.cs (or Program.cs in newer versions), you register your services with the DI container using methods like services.AddTransient, services.AddScoped, or services.AddSingleton. These methods also define the lifetime of the service:
Transient: A new instance is created every time the service is requested.
Scoped: A new instance is created once per client request (e.g., per HTTP request in a web application).
Singleton: A single instance is created the first time it's requested and reused throughout the application's lifetime.
-----------------------------------------------------------------------------------------------------------------
Introduction
In this article, we are going to discuss Custom Middleware. This is a second article on middleware. I recommend reading the first article here before continuing on this.
This article can be used by beginners, intermediates, and professionals.
We are going to cover,
- How to create custom Middleware?
- How to use custom middleware in the HTTP pipeline?
Let’s start with custom Middleware,
How to create custom Middleware?
Asp.net core provided many in-build Middleware but in some scenarios, we need our own middleware to fulfill our requirement, in such case will go with custom middleware.
In the first article, we have written inline middleware but in the real world, we will create a separate class for middleware that is called custom middleware.
There are 2 ways to create Custom Middleware in Asp.net Core.
- Using IMiddleware interface
- Using the extension method.
Let’s try to learn how to create custom middleware using IMiddelware Interface the below example,
Step 1
Create a class and name it “CustomeMiddlewareDemo”
Step 2
Inherit “IMiddleware” interface from “Microsoft.AspNetCore.Http” namespace and implement it as per the below code.
Step 3
Now we will add code for Custom middleware in the “InvokeAsync” method.
You might notice that I have added async and await for “InvokeAsync” Method.
We have created a separate file for Custom Middleware and now we will learn how to use it.
How to use Middleware in the HTTP Pipeline?
We will consume newly created custom middleware in the HHTP pipeline.
As we know if want to use any kind of new services in the ASP.Net Core application then before we use we need to register startup.cs -> “ConfigureServices” method.
Before we use Custom middleware in the code, we will register in the “Configure Service” method.
Step 4
Configure CustomMiddleware in the “ConfigureService” Method.
Step 5
Now we will use CustomMiddleware in the HTTP Pipeline. For that, we will inject custom Middleware in the “Configure” method like below.
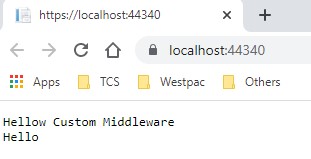
OUTPUT

Now we will create custom middleware using the extension method,
Step 1 - Add a new Middleware class to the project
Right Click on Project -> Add -> new item -> Asp.net Core -> Middleware class
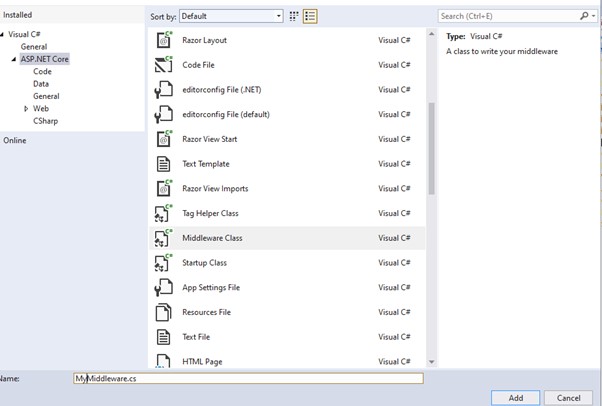
Click on Add button and observed Middleware class code.
Step 2
Add your custom code in the “Invoke” method of the Middleware class.
Step 3
Use Custom Middleware in the HTTP pipeline.
OUTPUT
That’s all for this article. Hope you enjoyed and learn how to create and configure Custom Middleware in the HTTP Pipeline.
-
Q) What is the startup class in ASP.NET core? A) Startup class is the entry point of the ASP.NET Core application. This class contains the ...
-
@ Component ({ selector : 'app-root' , imports : [], templateUrl : './app.component.html' , styleUrl : './ap...
-
 Delegates in c# with example · Delegates are type-safe function pointers. It holds a reference(pointer) to the function. · ...

